> ## Documentation Index
> Fetch the complete documentation index at: https://docs.rdrive.io/llms.txt
> Use this file to discover all available pages before exploring further.
# Setting up SSO - Azure AD
> Login to RDrive Company Level
# This article shows you how to add an Azure AD as an Identity Provider for SSO (Single Sign-on).
1. [Setting up Azure AD for SSO:](#setting-up-azure-ad-for-sso%3a)
2. [Create user:](#create-user%3a)
3. [Edit the newly created user:](#edit-the-newly-created-user%3a)
4. [Register RDrive as an application:](#register-rdrive-as-an-application%3a)
5. [Create a new client secret:](#create-a-new-client-secret%3a)
6. [Token configuration:](#token-configuration%3a)
7. [Back to Overview:](#back-to-overview%3a)
***
## Setting up Azure AD for SSO:
1. Login to RDrive Company Level
2. From the navigation menu choose: Security > OpenID
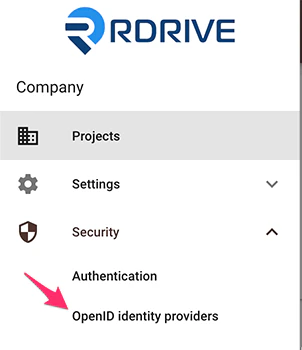 3\. Choose 'Add Identity Provider' using the + button.
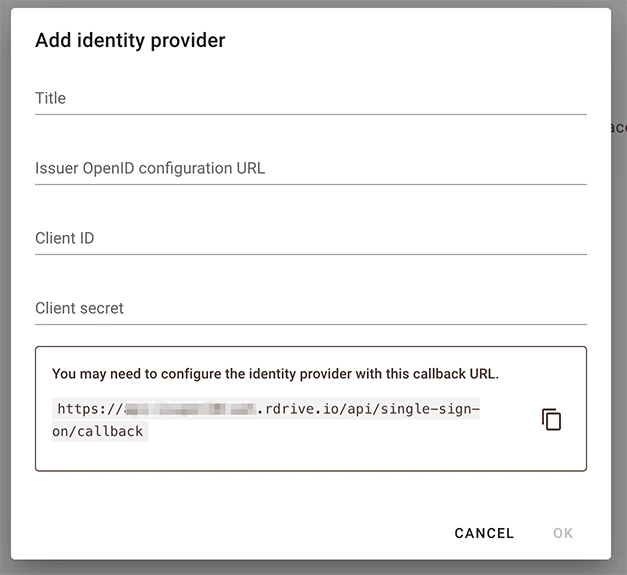 4\. Copy the callback URL.
Next please log in to your Azure for the following process.
***
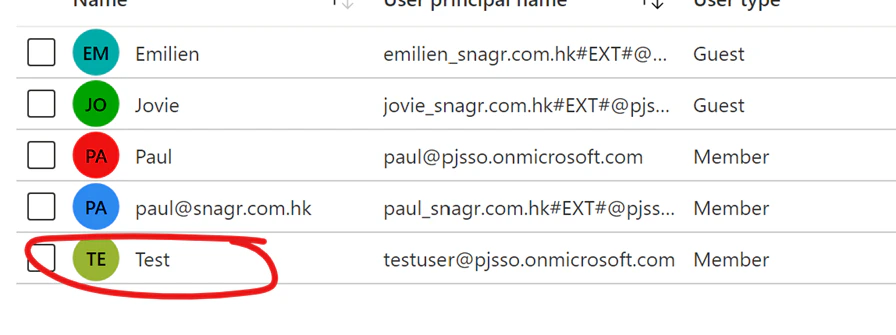
## Create user:
1. Go to the active directory page.
2. Users from the left side menu.
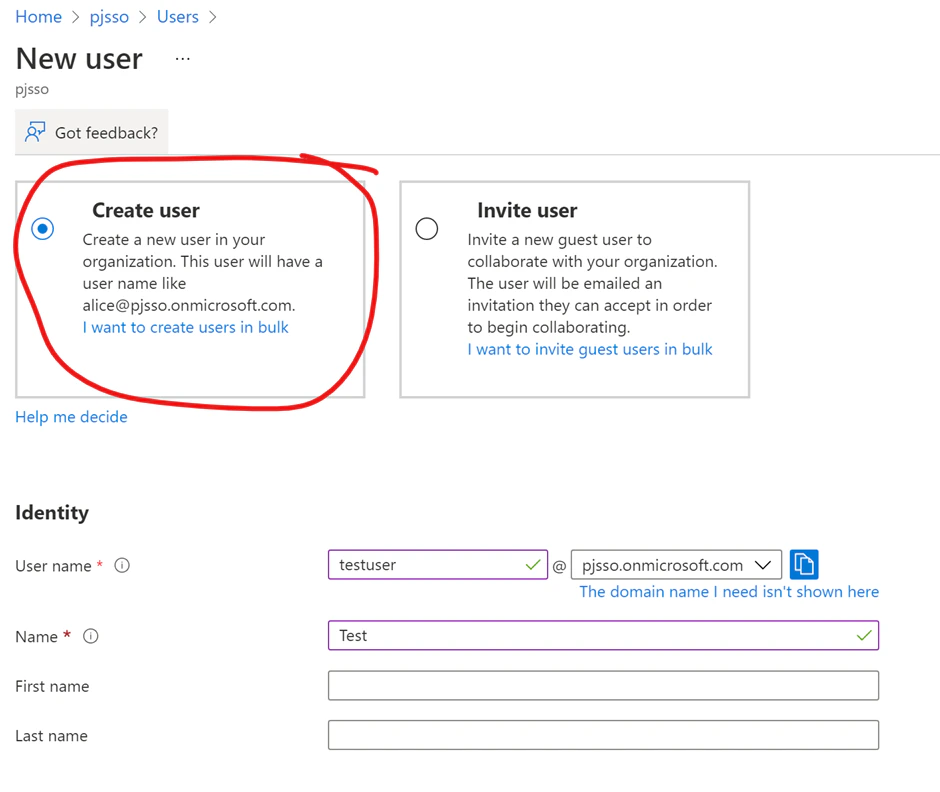
3. Create new user, not invite, so that the user is managed by the Azure AD.
4. **Fill in the First name and Last name!** These are mandatory information for Okta to create a new user.
4\. Copy the callback URL.
Next please log in to your Azure for the following process.
***
## Create user:
1. Go to the active directory page.
2. Users from the left side menu.
3. Create new user, not invite, so that the user is managed by the Azure AD.
4. **Fill in the First name and Last name!** These are mandatory information for Okta to create a new user.
 ***
## Edit the newly created user:
***
## Edit the newly created user:
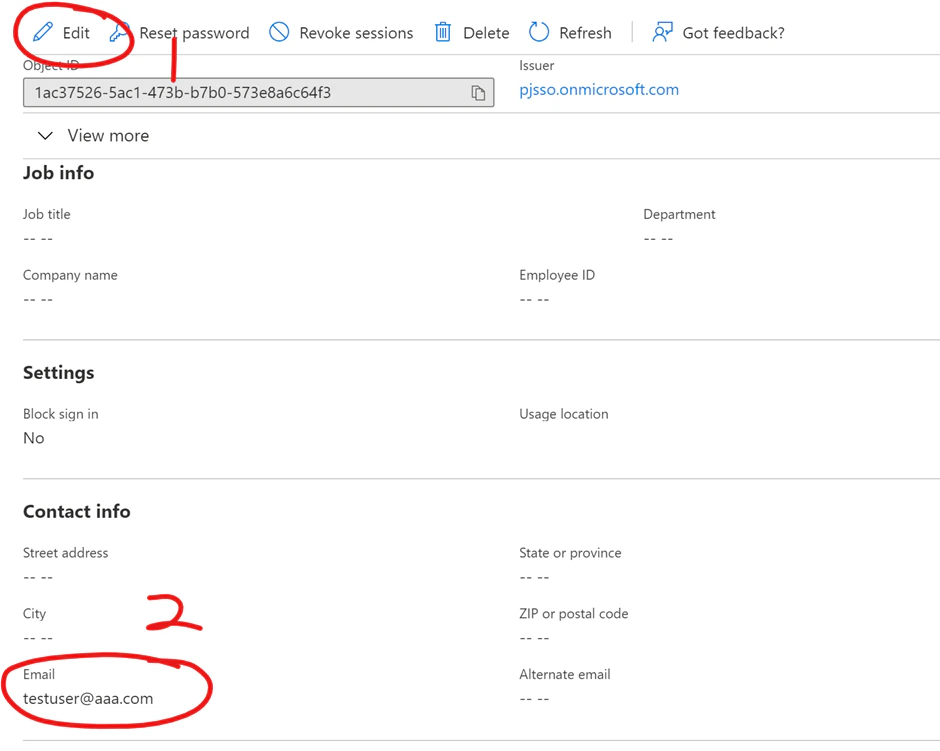
 1. Click Edit to allow editing.
2. Fill in the Email field.
3. Save changes (right to the Edit button).
1. Click Edit to allow editing.
2. Fill in the Email field.
3. Save changes (right to the Edit button).
 ***
## Register RDrive as an application:
1. Back to the active directory page. Click **App registrations** from the menu on the left-hand side.
2. **New registration.**
3. Create a new APP, and name it. Leave the redirect URI blank, will add one later.
***
## Register RDrive as an application:
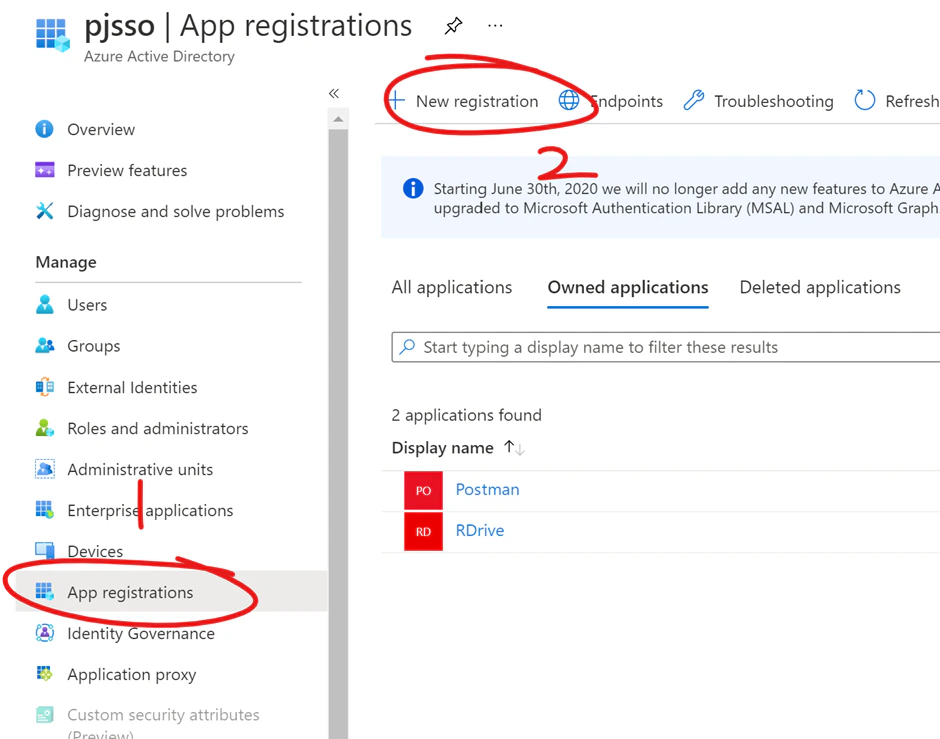
1. Back to the active directory page. Click **App registrations** from the menu on the left-hand side.
2. **New registration.**
3. Create a new APP, and name it. Leave the redirect URI blank, will add one later.
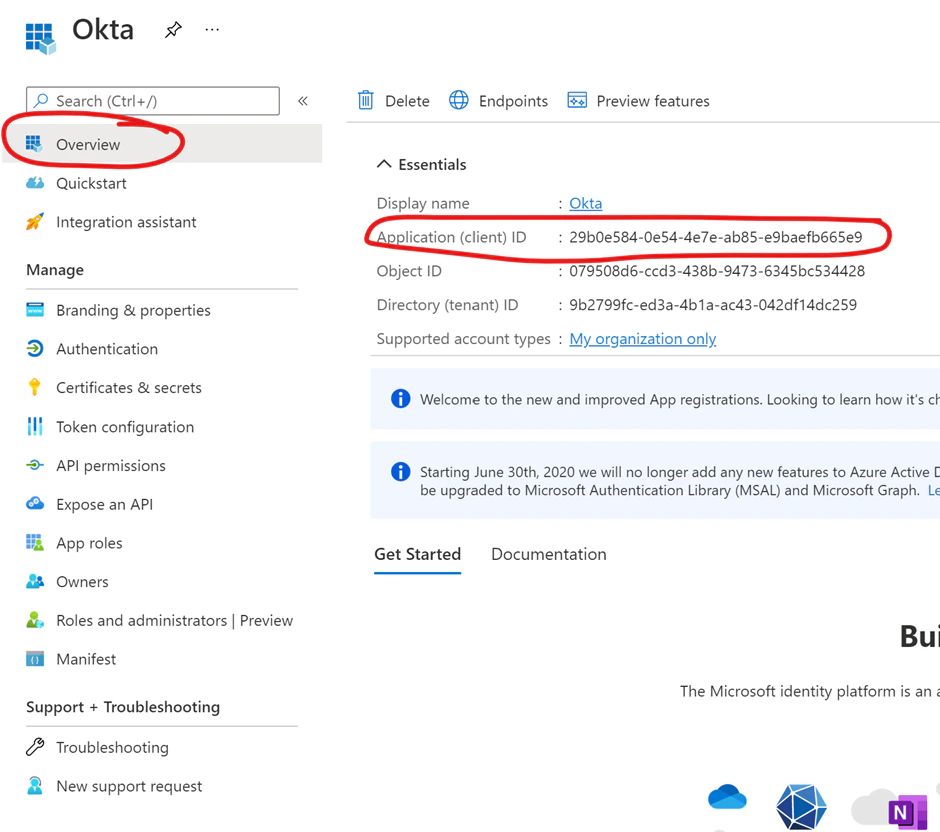
 4. Go to Overview of the newly created APP.
5. **Copy** the client ID, and store it for later use.
4. Go to Overview of the newly created APP.
5. **Copy** the client ID, and store it for later use.
 ***
## Create a new client secret:
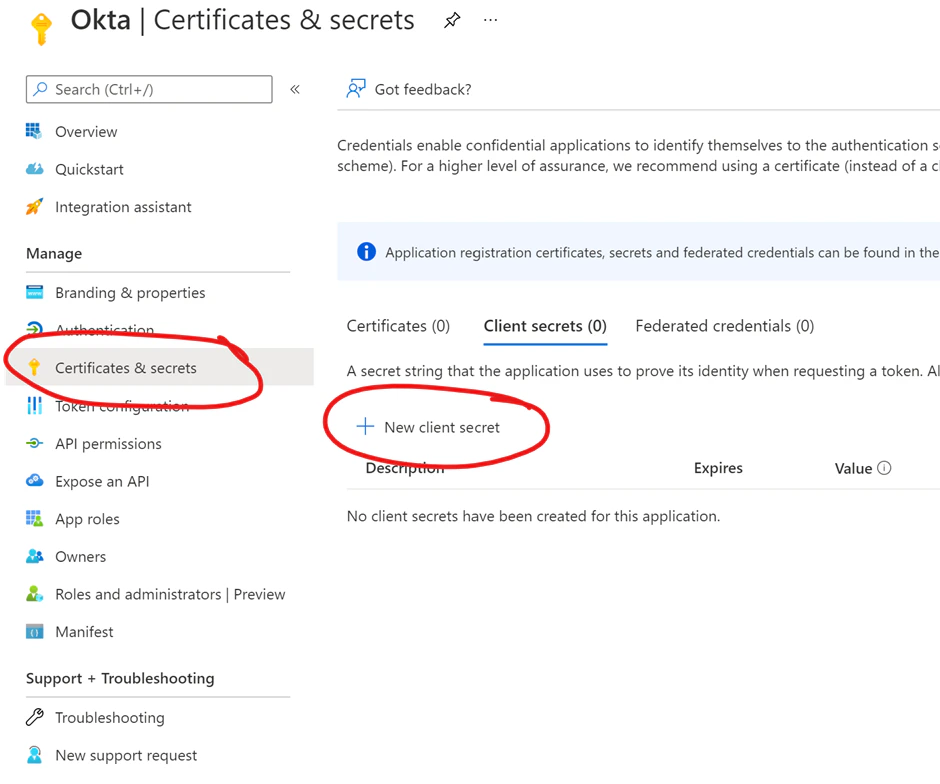
1. Click **Certificates & secrets**
2. Create a **New client secret.**
***
## Create a new client secret:
1. Click **Certificates & secrets**
2. Create a **New client secret.**
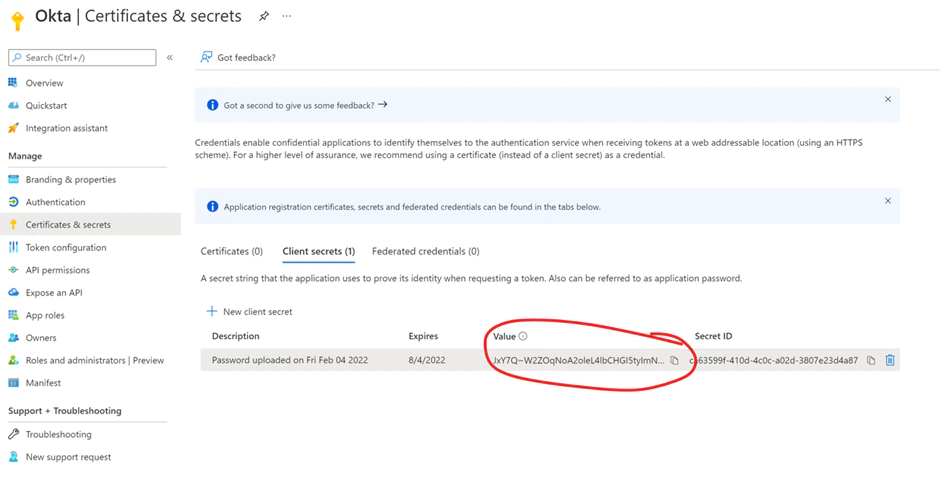
 3. Copy the circled value, and store it for later use. (✨The secret is shown only once)
 ***
## Token configuration:
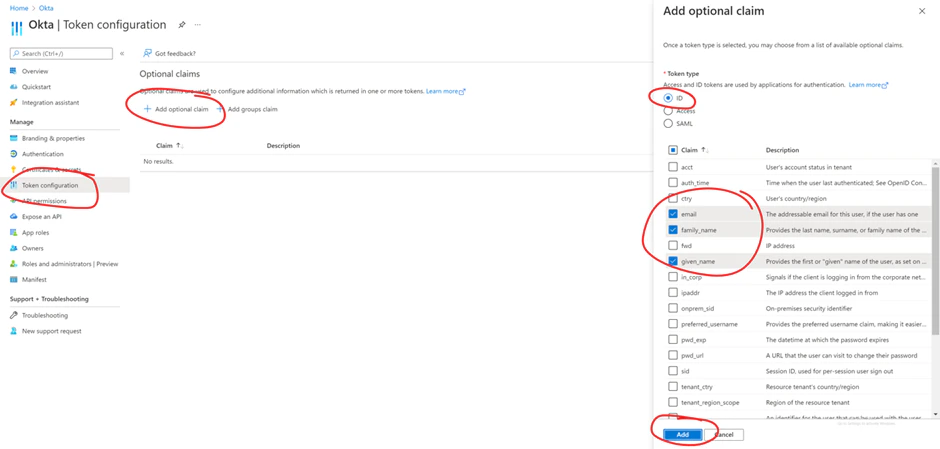
1. Add optional claims to the ID token.
(Options are shown only when you check the ID button.)
***
## Token configuration:
1. Add optional claims to the ID token.
(Options are shown only when you check the ID button.)
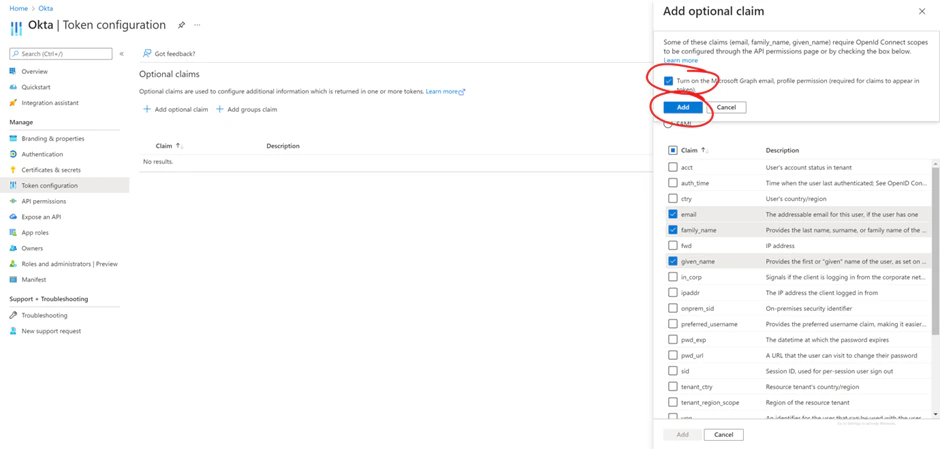
 2. Upon clicking Add, it asks you to add the required permission. Check the box to agree.
 ***
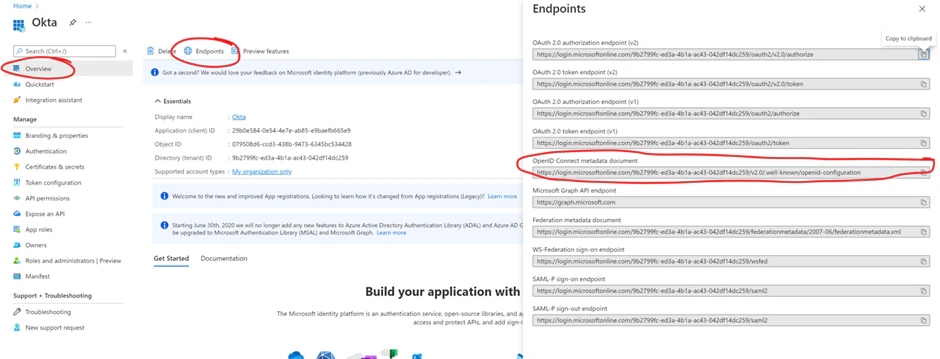
## Back to Overview:
1. Go to Overview of the APP.
2. Endpoints
3. Get the OpenID configuration URI.
***
## Back to Overview:
1. Go to Overview of the APP.
2. Endpoints
3. Get the OpenID configuration URI.
 4\. Back to RDrive and now add a 'Title' (in case you have multiple identity providers), OpenID configuration URI, ClientID & Client secret.
5\. When this is complete you can click 'Ok'
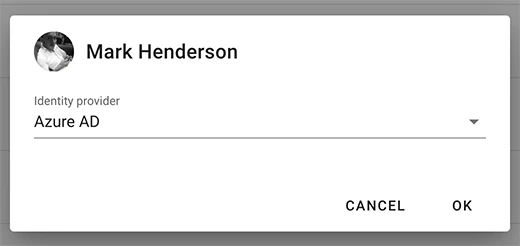
Your new identity provider is now available to select from the dropdown list when adding or updating a User.
4\. Back to RDrive and now add a 'Title' (in case you have multiple identity providers), OpenID configuration URI, ClientID & Client secret.
5\. When this is complete you can click 'Ok'
Your new identity provider is now available to select from the dropdown list when adding or updating a User.