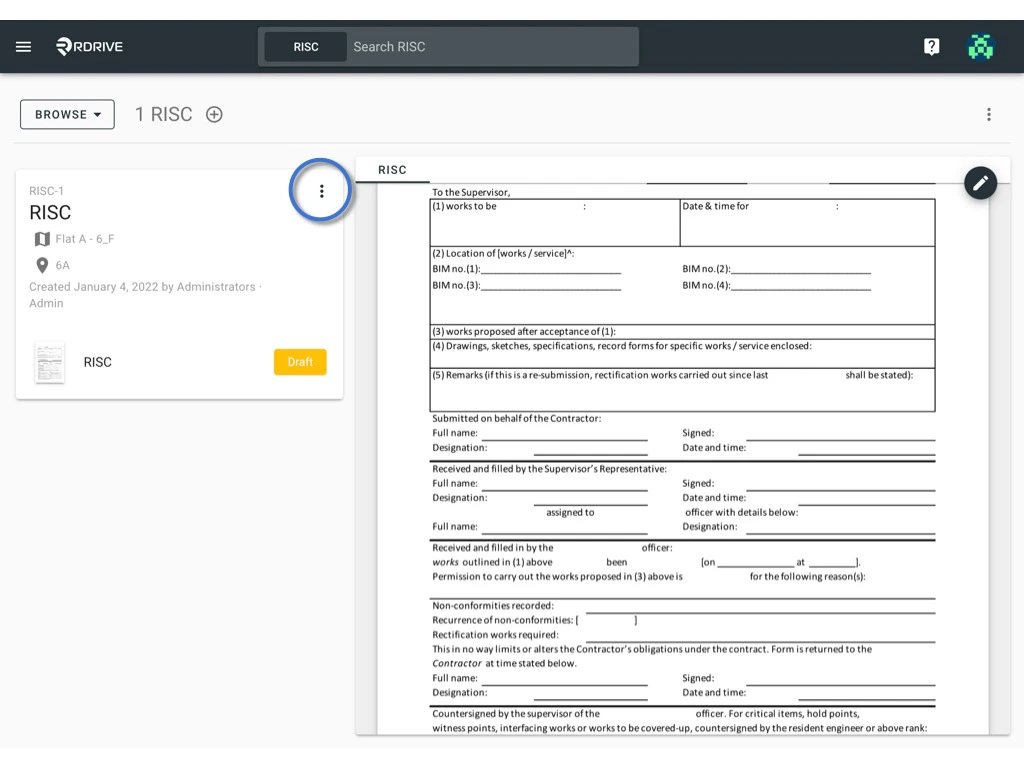
Changing Controller via Control Option:
- Process
- Find the Process from Plan viewer or Finder.
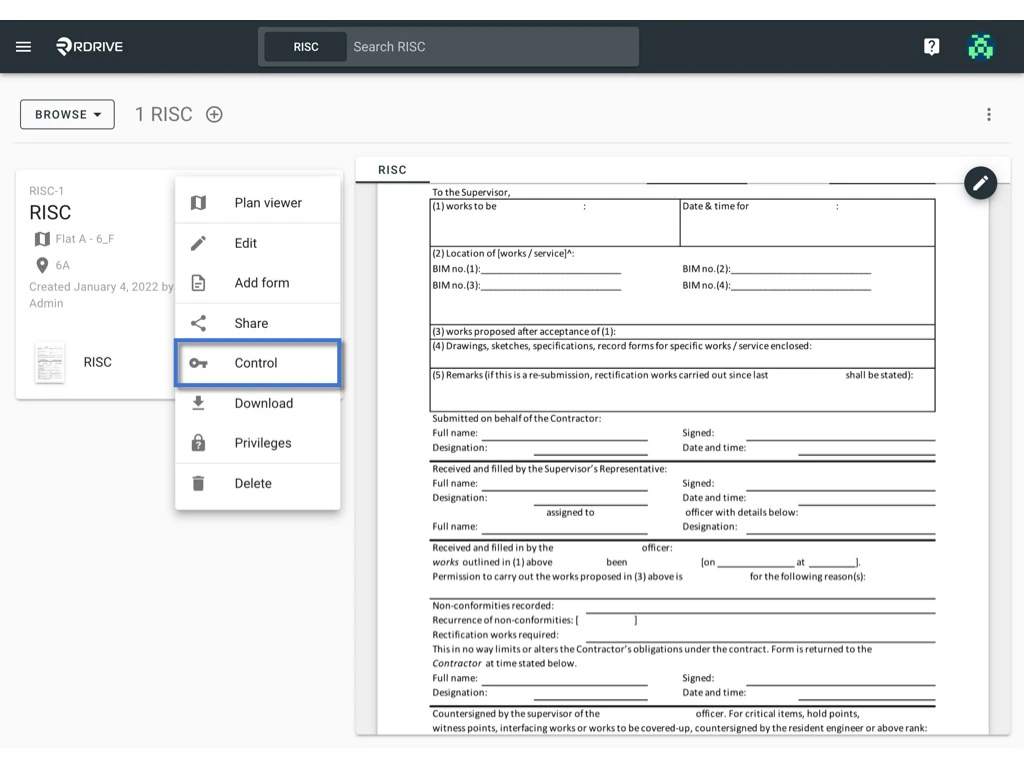
- Click the ⋮ button to reveal a menu.
- Select “Control” from the options available.
- Click on “CHANGE” to initiate the controller change.
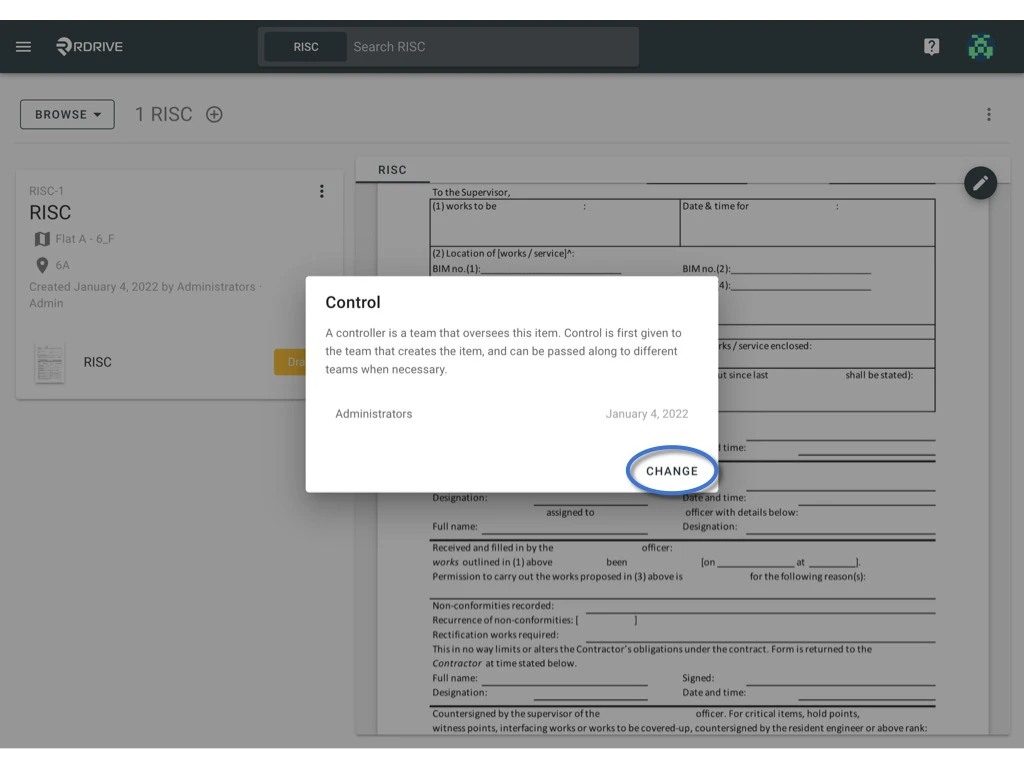
- Choose the team you wish to assign control to, then confirm by selecting “OK.”
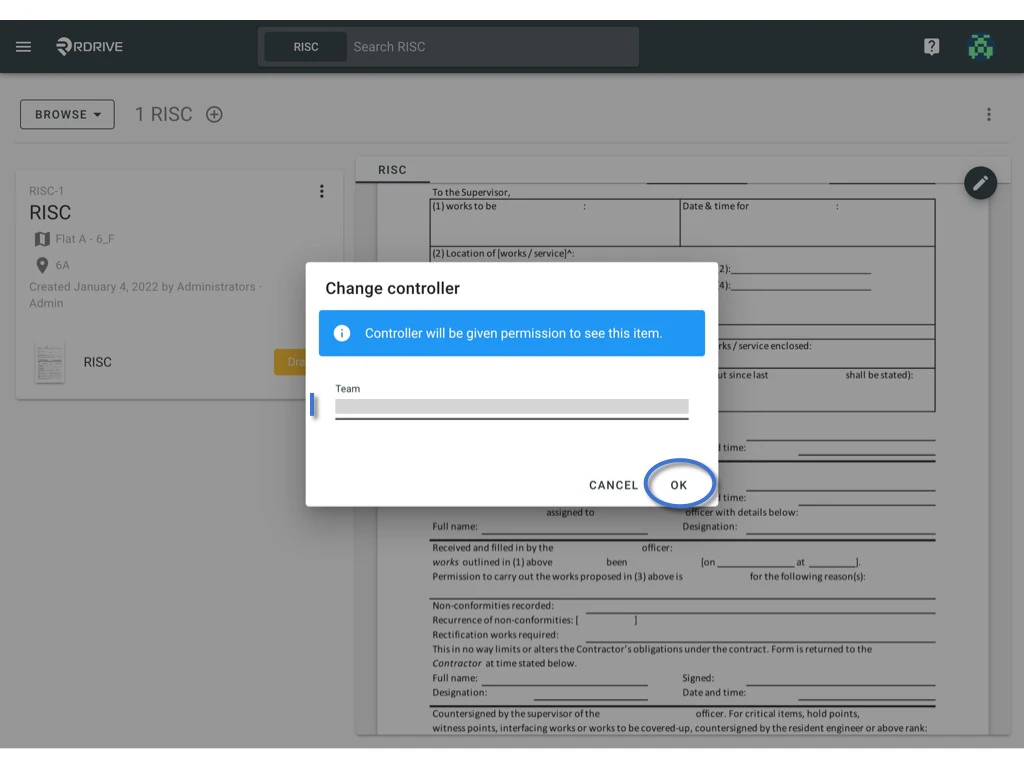
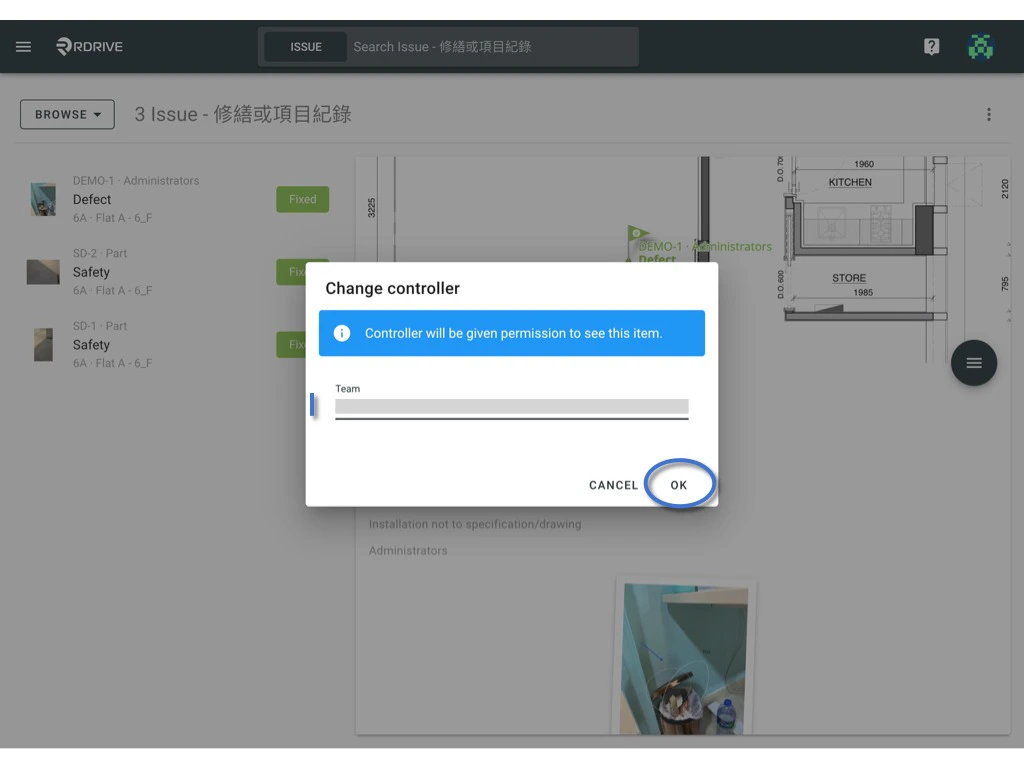
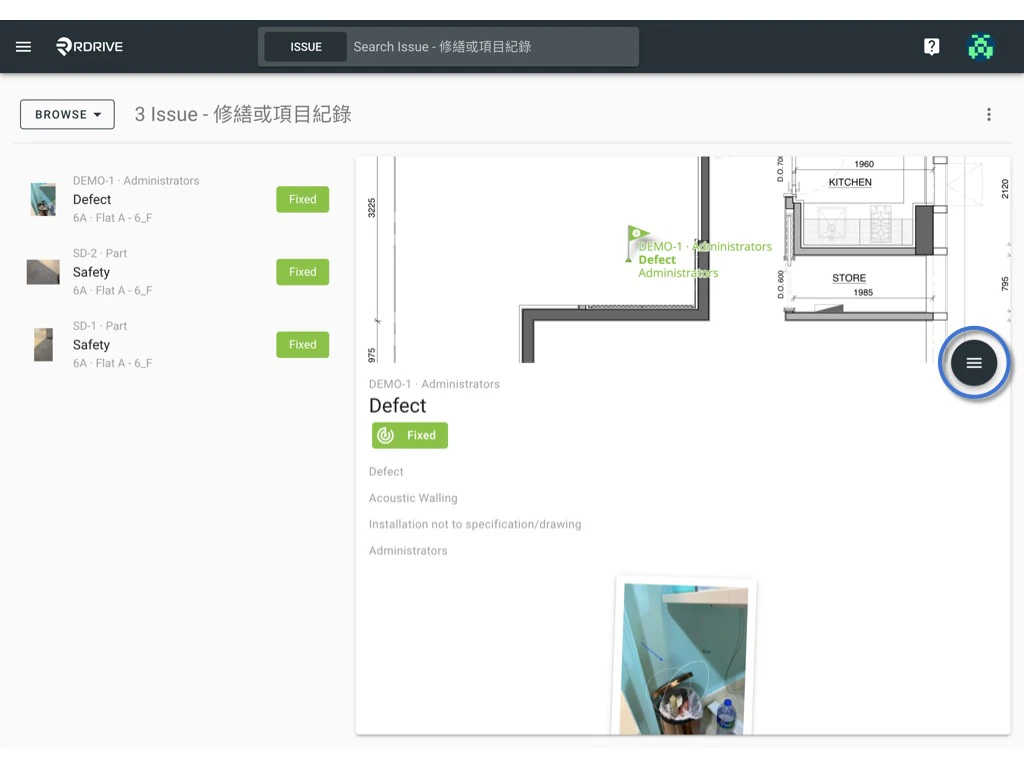
- Issue/record
- Find the issue/record from Plan viewer or Finder.
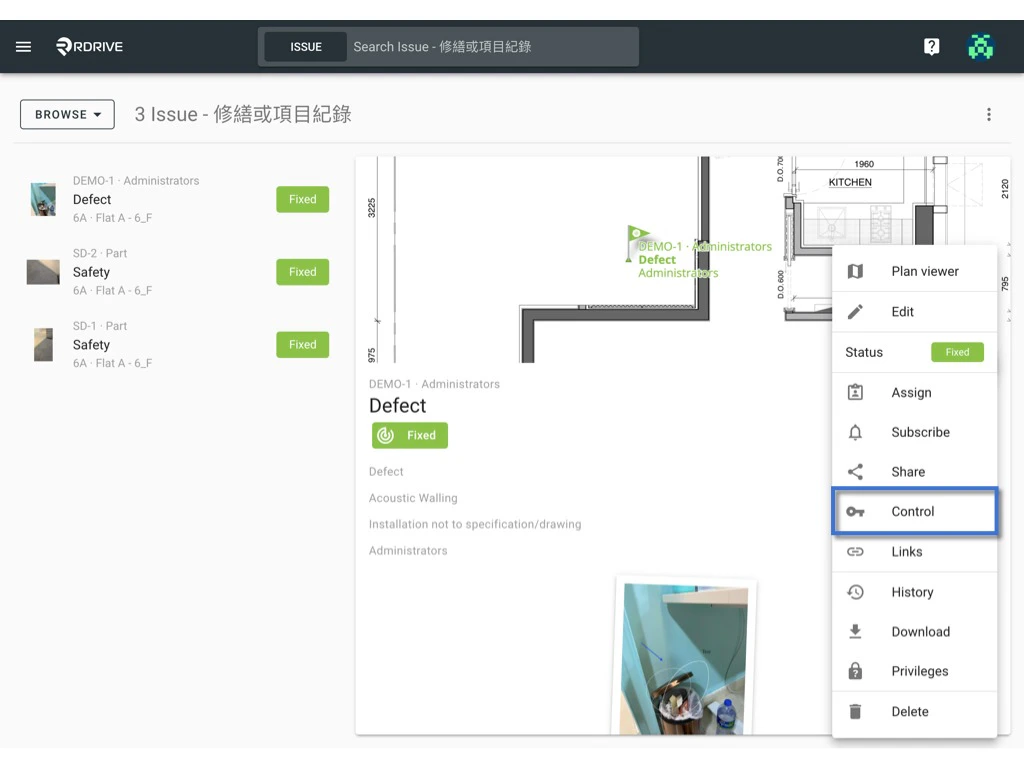
- Click the ≡ button to reveal a menu.
- Select “Control” from the options available.
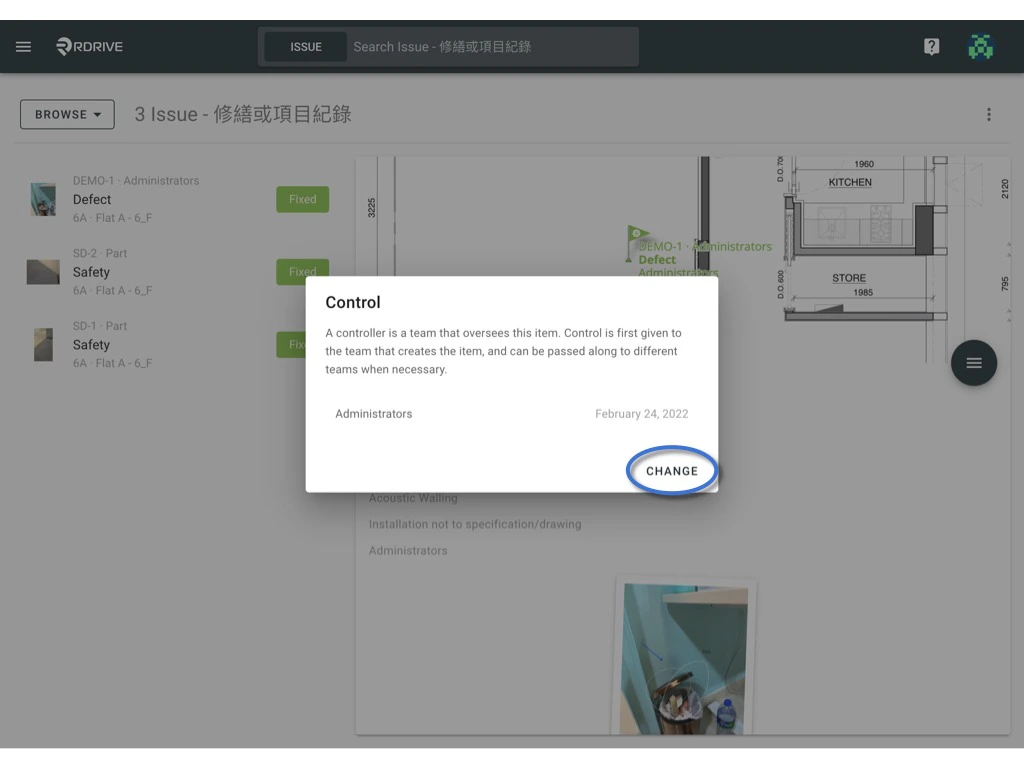
- Click on “CHANGE” to initiate the controller change.
- Choose the team you wish to assign control to, then confirm by selecting “OK.”